“During lockdown, I became (and am still increasingly becoming) emotionally attached to my sourdough starter. Like a Tamagotchi or a houseplant for a just-maturing millennial, my starter has become a practice run for looking after another living being.”
“Word Search Creator is free and open source (GNU GPLv2), there are no feature/time limits. Download v1.1. – Play on screen. – One click shuffle words. – Choose the directions of the words. – Set the size and shape of your word search. – Use Auto-enlarge to guarantee all words will fit.”
“Include line breaks (i.e. newlines, not HTML line breaks) between list items? The variables can additionally be augmented with filters. To use a filter, add a pipe character(|) followed by the name of the filter before the closing bracket in the variable, e.g. %[name|lower]% or %[number|zeropad]%.”
“At first glance, the workbench in “The Anarchist’s Workbench” appears to be almost identical to the bench I built in 2005, which has shown up in a number of magazines and books. It’s chunky, made from yellow pine and the workholding is a leg vise, planing stop and holdfasts.”
It’s been a week and the joist hangers still haven’t come in. Home Depot actually cancelled that part of my order (I had also ordered 4 rubber washers for $2.50 and they kept that part of the order – hey Home Depot, I’m not coming just to pick up 4 rubber washers). I then placed an order at Lowes but that isn’t ready for pick-up either. On Sunday I though there had to be something I could do with what I have so I went to the side yard and did what I could.
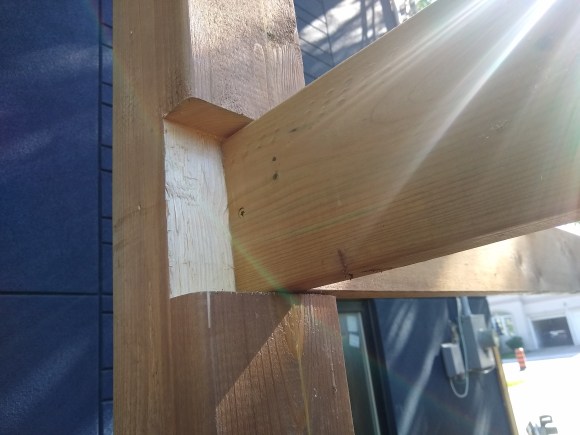
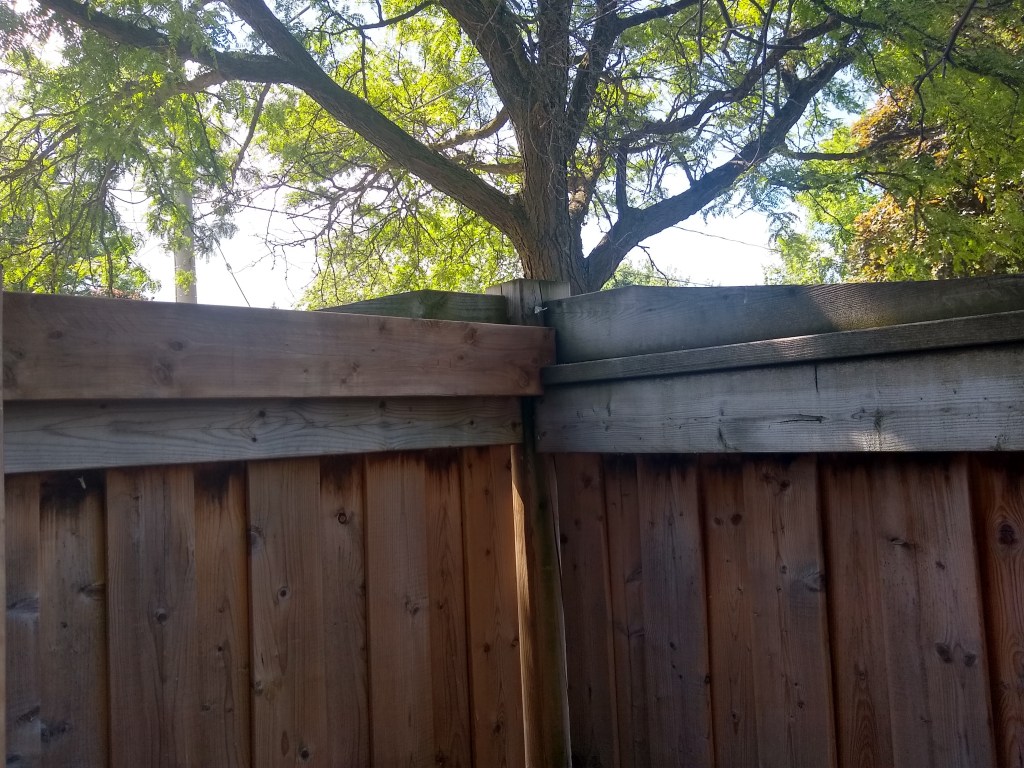
My initial plan was to connect the joists to the fence posts using the joist hangers. Without the hangers I decided to cut a space between the beams I already attached to the fence posts and have the beams fit in that space. To keep the joist up I screwed in a piece of wood directly under the beams and the space I cut so that the joist could rest on it. I attached it using a structural screw as well as two 3″ framing nails. With the fence side secured I could then cut notches in post on the other side for the joist to fit into there.
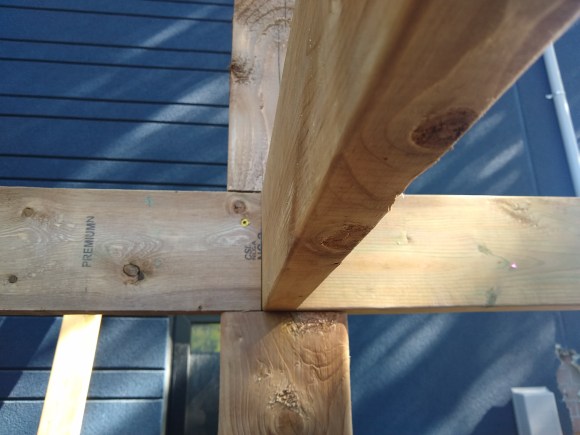
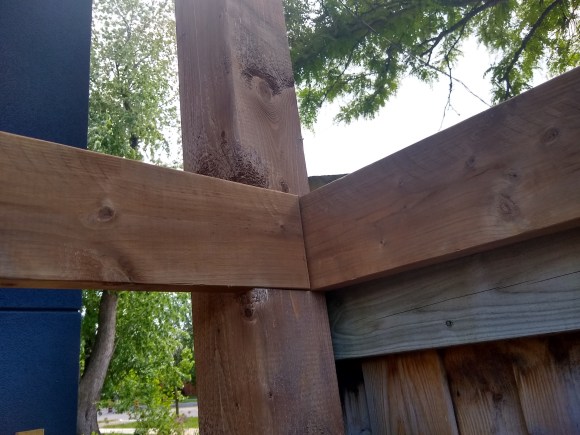
The beam from the first post comes to one side of the notch, the joist from the fence post comes to the middle of the notch and the beam to the next post will come to the other side of the notch. I screwed the first beam into the post using a structural screw and then screwed the joist into that beam. For me that makes more sense then screwing it into the post at some angle.
Here are the joist and two beams all fastened in place. I did some chin-ups on it and it isn’t going anywhere. Having the joist and beams go straight into the notch on this side would be significantly stronger than any joist hanger as basically the structural integrity of the post itself keeps them up.
There is one more section to put in. Then I will put more posts halfway through each of the sections so that there’s about a 4′ spacing between the posts on the side opposite the fence. That’ll be next weekend’s work. If I get the joist hangers by then I’ll put those in as well and the main structure will be complete. Then it’ll be time for the roof.
Last week I went to Home Depot to pick up some of the wood and fasteners I’d need. For my joists I decided that I would use metal hangers to attach them to the front and rear beams. The other option would be to just nail or screw them in directly or support them underneath with some wood as I did for the floor of my shed. I read up about the metal hangers and they can support quite a lot of weight and have the advantage of not requiring me to access the back of any of the beams, which is useful as the rear one will be attached to the fence.
Home Depot was quite busy when Tomoko and I went and there was a long lineup just to get inside. I needed to get some plywood cut to more easily fit in the car and also a bunch of 6×6 posts but with me not wanting to wait around I ended up just buying a dozen 2×6 boards and some construction screws. I was about to buy the joist hangers but I wasn’t sure in my mind at the time exactly how many I’d be using and there were tons so I could just pick them up when I came to get more wood.
The following Saturday I went early in the morning and there was no lineup. I was able to get my posts and cut the plywood but I couldn’t find any of the metal joist hangers. No big deal, I could just pick them up from the Rona down the street (the main reason for going to Home Depot is that they’d cut the plywood for me) when I needed them. At home I started putting the pieces I had together.
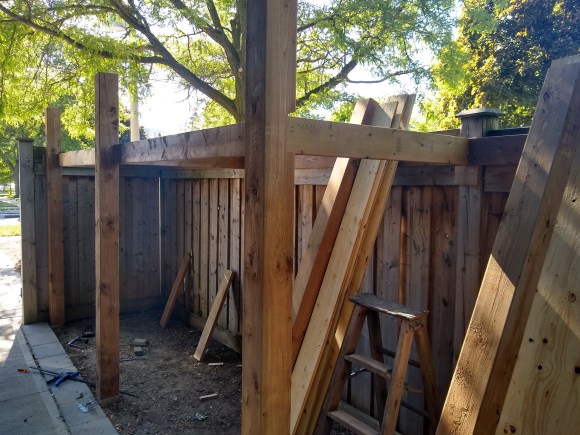
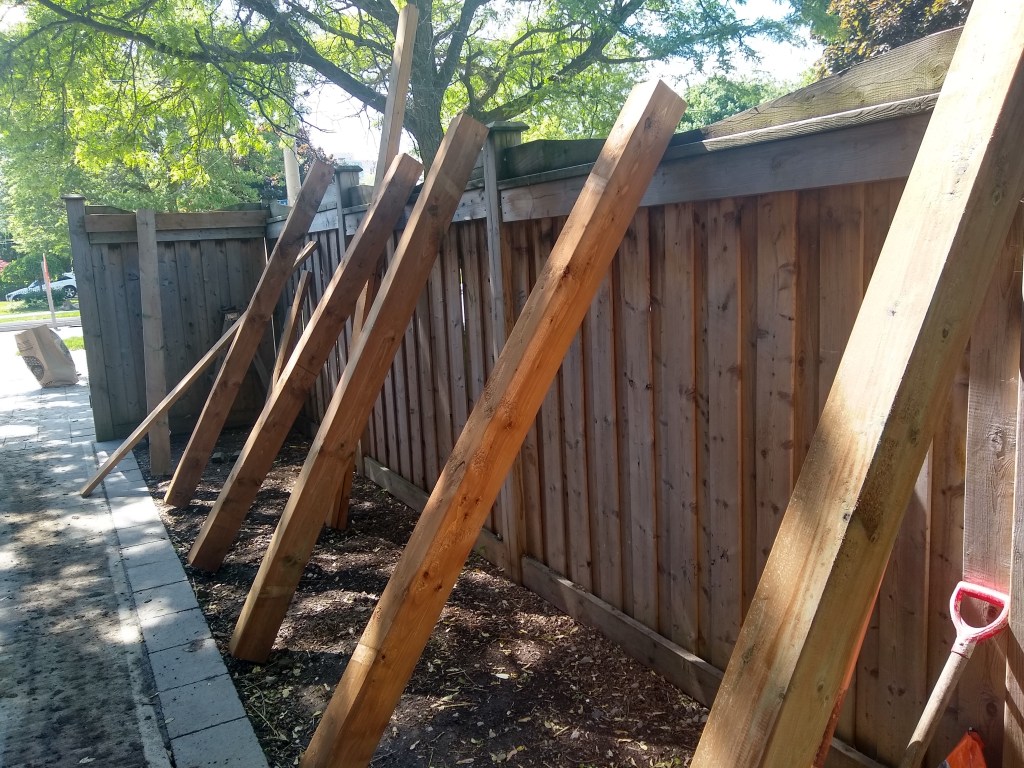
These are the posts lined up roughly where they’ll be once all is said and done. The space in question is a bit more than 4 feet wide by a bit less than 24 feet long. The posts are spaced 4 feet apart except closest to the gate where the posts would be 8 feet apart with two 2×6 boards in that section to create separate areas for the garbage and recycling containers.
The corner post was taken up by the fence panels so I needed to cut in a space so that I could attach the end joist to it. I had to remove a couple of nails and then cut out a space using a mallet and chisel. Once it was cut out I could insert the board into the space and attach it with some construction screws. I then attached the beams that follow the rear fence to the already installed fence posts, which was fairly straightforward. In my plans I thought that the ground was sloped enough that following the fence would give me enough of a slope. However when I measured the angle it was only a degree off level. So I’ll make the front higher than the back and have the slope go that way instead.
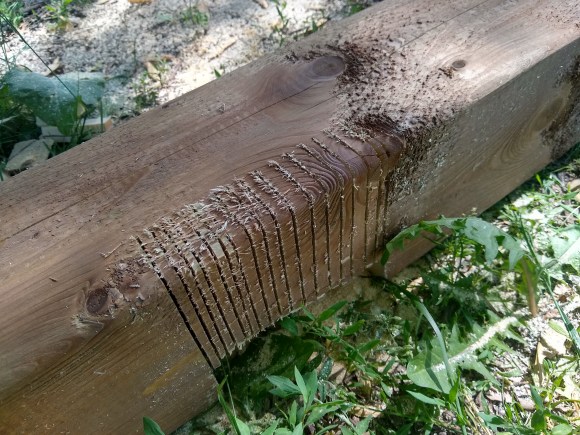
Then it was time to cut notches in the first post for the joist to fit into.
The first step was to measure out the area I needed to cut. Once that was measured I made a whole bunch of cuts with my circular saw. Basically once you’ve cut at the two ends you can do what you want in between them because everything will be removed anyway. Once the cuts were done it was back to the chisel to remove the excess wood.
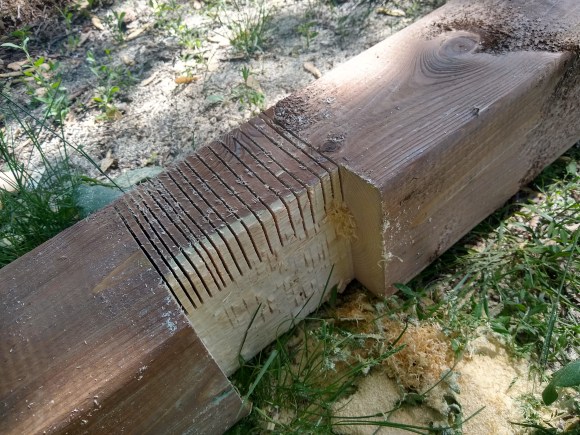
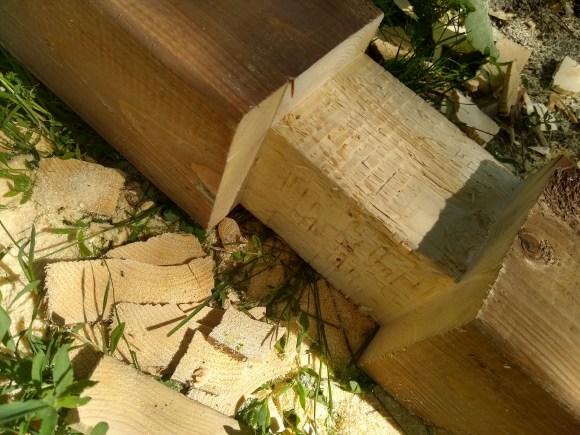
The wood came out quite easily. It took a bit more effort to then clean the space up and make it relatively straight and smooth. I put it in place to see how it would fit with the screwed-in joist and had to widen it slightly so that it would fit. For whatever reason the 2×6 I was using to test my cut was narrower than the 2×6 for the joist, shouldn’t they all be the same size? The next step was to do the same for the back of the post where the beam across the front was going to go. Again I marked the area and then using my circular saw I cut a whole lot of notches in it. Once that was cleaned out with my chisel I had this:
And I put it in place to make sure the wood would fit.
Now it was time to work on the next post, but I needed to get some joist hangers so that I could cut the joist and measure the post to where it’s supposed to go. So with no joist hangers it would have to wait until the next day, which was fine because I needed a break anyway.
I checked Rona’s website and for whatever reason they don’t carry the joist hangers. So I decided that I’d just go to a different Home Depot on Sunday morning and I’d drop off some seeds at a friend’s house who lived near that Home Depot. When I got to the Home Depot I found that there weren’t any joist hangers even though the website was telling me there were 40-something in stock. A helpful employee tried to locate them for me but after a fair bit of time was unable to. No matter there was another Home Depot not too far away that had over 80 in stock. Yet when I got there they were all gone too. Apparently someone had picked them all up before I got there. Defeated I dropped off the seeds and went home. And then placed an online order for the joist hangers so that I wouldn’t have to waste another trip to the Home Depot.
Now I’m just waiting to get the email that its ready for pickup so that I can resume work.
“Many knockdown workbenches suffer from unfortunate compromises. Inexpensive commercial benches that can be knocked down for shipping use skimpy hardware and thin components to reduce shipping weight. The result is that the bench never feels sturdy. Plus, assembly usually takes a good hour.”
So I already made a shed 10+ years ago but I want to get rid of it, it’s too big and blocks too much light, and Tomoko wants to convert it into a greenhouse or at least a place to overwinter some plants. At the same time we need a place to put our bicycles and other stuff that shouldn’t be left outside but doesn’t need to be in the house. Along the side of our house we’ve got a long area that’s fenced but isn’t really doing anything besides being a place to put our garbage bins. If I can partially enclose this area with a roof it’ll be better for the garbage bins – less snow will get on them, and I can use it to store the bicycles, lawnmower, and other big garden-type stuff that ought to be protected from the rain and snow. Tomoko, worrying that this might not be aesthetically pleasing said I should make the roof a green roof. Challenge accepted!
The basic structure will be straightforward enough. I’m going to use my existing 6×6 fence posts as support for the rear and one side of the structure and then place more 6×6 posts in the front. The fence posts are roughly 8 feet apart and in the front I’ll space the new ones 4 feet apart. At the top of the posts I’ll run 2×6 lumber as beams and I’ll have 2×6 joists running across them every 16 inches. Above that will be the roof which’ll be 3/4″ plywood. As our ground slopes from the front to back and the fence follows the slope the roof of the shed will also be sloped which will allow the roof to shed water.
In my reading about green roofs they all mention that they will be much heavier than a normal roof because of the added weight of the growing media as well as the additional water and snow it’ll retain. In my initial planning I was going to make the beams and joists out of 2×8 lumber but it feels like overkill. The joists are only going to span 4 feet. I bet 2x4s would probably be strong enough but a bit of over-engineering is OK.
For the green roof I am going to border the roof using 2x8s. Put down a layer of polypropylene underlayment, then 45 mil pond liner, another layer of the underlayment, then gravel for drainage, landscape fabric, and then soil on top of that. My soil depth will be around 4-5 inches so I’ll be limited in what will grow on it. The plan is for a mix of sedum, thyme which we’re already growing, and whatever else I can find that has shallow roots and won’t be asking for too much attention.
The good thing about a storage shed like this is that it has a fairly low-stakes failure mode. If the green roof leaks then there’ll be some dripping on the garbage bins or bicycles but there isn’t a floor that’ll get damaged. If the actual structure isn’t sound I’ll be able to see some bowing before the whole thing comes crashing down on the bicycles. Even then I only really need to worry about Tomoko’s.
1-2 peppers (try three halves of different colours)
1 onion, finely chopped (or spring onions, single bunch)
Marinade
1/2 c. sugar
1 c. vinegar
1 tsp. salt
1 tsp. pepper
3/4 c. oil
In a large bowl place shredded vegetables. Combine ingredients for marinade in a saucepan and bring to a boil. Pour hot marinade over coleslaw mixture and toss well. Cover and refrigerate for several hours or overnight.